 |
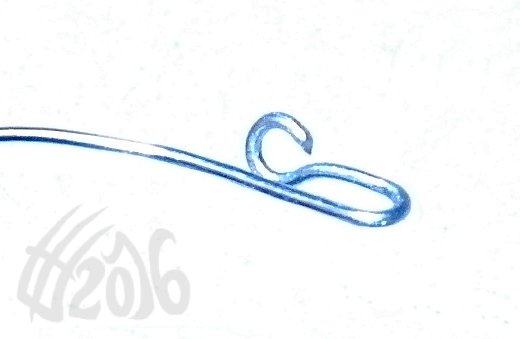
| This turorial's hook was originally made for Schleich stuff, so it had to be that small. Yet more it is in scale with traditionals. |
This type of hook is the simplest thing ever to make, and when I first did a tutorial about this to my other blog, I thought if that was stupid. But it was not; I've learned with humans that even the simplest things ever need to be told and shown, so they get the idea. So, here's how to make tiny hooks (or bigger, but isn't a 5 mm hook quite small?).
Why to make hooks? I use them as a attachment piece for everything that requires clasps and clips: halter throatlatches, ropes, etc. That includes also replacing some bridle buckles with hooks (to attach bits), and adding hooks to rein ends for same reason. This makes it easy and quick to change bits and reins, as you may guess.
What you will need:
- jewellery pliers: round, flat/thin and cutters
- thin (but not fragile) metal wire
 |
| Ignore the big pliers and thick wire. |
To start, get the wire you need and cut at least 20 cm long piece from it.
 |
| You need a long enough piece to hold from. |
Then get the round jewellery pliers and put the wire end in it like this.
 |
| A tip to tip. |
Make a loop. Don't release it yet; bend the excess wire a bit 'backwards' so you get the loop rounder, like in the second pic.
 |
| The loop after shaping... |
 |
| ...and bent backwards. That loop can get closed a bit more with flat pliers. |
Then hold the wire in pliers couple of millimetres away from the loop, and bend it from the excess wire to the shape of long U.
 |
| I roughly measure it from how wide the loop is. |
 |
| Bend to upwards direction. |
 |
| Almost done! |
Cut from near the loop. Gently trim the hook if it looks uneven.
 |
| The cut goes about to where the loop seam is. |
 |
| Finished hook! |
 |
| So it's half of a cm long... 2 cm is roughly a bit less than one inch. |
ALTERNATE
After bending the loop round, mark and cut the excess wire from about 5 mm length. I use the pliers itself to mark where to cut; I bend it by holding the wire in the pliers' root piece like the loop is touching them, bend, and cut that.
 |
| This is a bit (of old style) being made, but you get the idea of using plier roots (square shaped) for measuring. I mark the cut part by bending the "excess wire". |
Trim it if needed.
(I use that plier root -system as a rule of thumb when measuring things, and it also straightens wire when needed. I really measure all bit mouthpieces, certain bit part lengths, etc. with that. It's very useful really.)
TIPS
- I usually make a batch of hooks at once, or just loops with right length excess wire to bend them later when they get in use. This is another reason for the long wire to bend from.
- Bit hooks, that are those used to attach bits to bridle cheekpieces, differ from other type of hooks. That is because they better not to add too much extra length to the cheekpieces, and they also should be able to hold the bits securely and not allowing them to drop accidentally. When I do bit hooks, I make that typical loop + 5 mm piece, but I bend the U differently: I place the pliers right to the loop's seam and bend the wire over it, so the piece actually gets shorter than other hooks. When the bit hook is in use, the bent piece should be very close to or touching (depending from it's length) the leather part. Bit hooks also should have larger loops so keepers don't slide off from the straps and then jump wholly off from the piece via the hook.
 |
| Two bit hooks and a normal hook. |
 |
| Bit hook in use. (This bridle is old and my way to make certain parts have developed much after it, so the bit hook doesn't match my todays version of it as much.) |
- After the hook is got in use, remember that there is no need to constantly bend it open and close to change bits or related. When made correctly, that simply is not needed. Also the hook will become misshaped (or eventually break!) if you continuously fumble it. We don't want that to happen.
- I often use tweezers and pliers to handle small metal parts, like curbstraps that are always a bit against attaching to the bits. This will both protect the pieces and also allow you to see better what you are doing.
ATTACHING TO THINGS
If you don't glue the strap to the hook's loop, you can bend the hook's loop to open with thin flat-nosed pliers (have a pair of them). Gently smuggle the hook's loop end to the strap's loop. Use a pair of pliers to push the hook's loop back into round shape. Trim if needed.
Next I could post a tutorial of how to make a moving English snaffle. Or it's placement...


No comments:
Post a Comment
Feel free to comment, tell your opinion, thoughts, just everything these posts bring on your mind. Though, we're not going to answer one word comments, and proper grammar would be well appreciated.