Years ago, I wrote and posted a halter tutorial into my oldest blog, The Tuherrus. Unfortunately that tutorial is no longer current, let alone useable. I give you a new one. In this I simply show you how I make an average warmblood halter in the style and progress I have at the moment. It can, and actually will, change over time.
 |
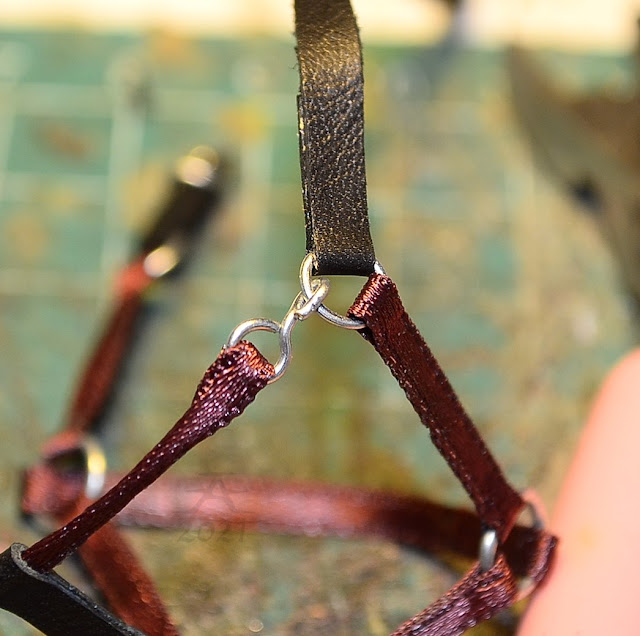
1. noseband, 2. chin piece, 3. cheekpiece, 4. connector, 5. throatlatch, 6. buckle piece, and 7. crownstrap.
|
Materials:
- 3 mm wide satin ribbon and 3 mm wide leather lace
- metal wire in thicknesses 0.4 mm, 0.7 mm, 0.8 mm and/or 0.9 mm (0.4 mm + one of the rest)
- a tube of contact glue which is suitable for stretchy/bendy materials (NO HOT GLUE GUN)
- roughly 9 mm wide strip of thin leather for paddings (optional)
Tools:
- a cutting mat with centimetre grit
- a craft knife
- two pairs of needlenose pliers (preferably small)
- large and small sidecutters
- round jewellery pliers
- a tool to spread glue with
- thin working gloves
- a filter mask + safety glasses (goggles)
Also a mechanical pencil with straight metal tip in size 0.3 mm or 0.5 mm, no lead inside.
----------------------------
START WITH METAL PARTS
I make all my metal parts myself, and yes, I use all the thicknesses I listed in the wire part. You can survive by using only 0.4 mm wire and one of the thicker ones listed. I use 0.8 mm because it's what the gold color was available as, while silver is easier to find in various thicknesses. I prefer the 0.9 mm for the front rings and rope ring, then 0.7 mm for the hind rings, hooks and some buckles as the other two could be too thin and too thick for these. After making so many halters for so long, I really don't recommend using only one thickness of wire.
Making and cutting metal parts is when I usually wear gloves and safety glasses.
So, when I make all parts from the very beginning, I start with metal parts. Jumprings are the simplest to make, and to these I use two kinds of round jewellery pliers. The longer ones have wider roots, which I use for the front rings and rope ring. The narrower pliers serve for the hind rings.
 |
Round pliers with thicker roots.
|
 |
Round pliers with narrower roots.
|
I use needlenose pliers to flatten the seam side a little, so that it has width just enough for a 3 mm lace/ribbon. I don't try to turn it into a D-ring.
 |
Flattening the seam side for a 3 mm ribbon.
|
 |
Hind rings on the left, front rings on the right.
|
Next I make a buckle in the shape of figure eight. For this I use the narrower round pliers, and bend the wire in the spot between midline and root. After the first loop, I turn the wire and bend the other loop similarly, but also so that the wire ends will not reach each other; it now should have some kind of middle bar.
The buckle will need some flattening:
I flatten the figure eight's middle bar and hope it's enough for
a roughly 3 mm wide to go around. I can also tweak the wire ends so
that they're apart enough from each other.
Then I determine which
is the smaller loop, and place the eight into the needlenose's wide
part so that I see about half of the bigger loop. I bend it upwards with
another pair of pliers (this is why you need to hoard these). Now the
buckle has a noticeable keeper loop!

I can also make square buckles, which do or don't have a keeper in them. The ones with keeper are surprisingly difficult to make nicely, let alone serially, so I don't even try to show how that works. But the square buckles whose keeper is separate (leather loop or D-ring) are very simple to make once you know how to. It is doable with the usual needlenose pliers everyone has, but I got actual square pliers with marked sizes for this. It clearly is not the most common kind of tool because people confuse it to the needlenoses, which it definitely is not. Needlenoses are not square; you can make some type of D-ring with it, which probably gives a bit of perspective. With the actual square pliers I can bend the "ring" in one go, though the ring also requires some careful trimming before it can be put into use. But that is normal.
I need some thin parts, so I take the 0.4 mm wire and do a tiny loop. This time it has to be as small as possible -
this will go into the buckle. I use small sidecutters to clip some of
the loop off so it can sit more snugly once in place.
Now, I take this thin "hook
loop" and place it so that the open slot is facing out of the buckle's
bent part, and press it shut carefully. Now the buckle has a tongue.
Then I take the longer round pliers and 0.7 mm or 0.8 mm wire to make throatlatch hooks. First I make a loop which I then bend backwards to even it out...
...and then I use the pliers' square part to bend a corner there. This is where I clip it - I repeat this a few times, and will have several "hooks" in equal length! (I like to make things in batches also because the loop sizes can vary. When I have a bunch, I can just pick the most matchy ones as a pair.) I use another round pliers' square part to pinch and then snap off the sharp point of each hook.
 |
My pliers actually have a worn out/dyed part in them which is where I bend the loops. It's about 1/3 of the plier jaws' length.
|
The rope ring needs a small part, so I make a random tiny ring from the 0.4 mm wire. Then I use the flat needlenose pliers to flatten the seam, so now it is a D-ring. I bend the round ring open, put the tiny D in it and close it again.
LEATHER AND RIBBON
For leathers and ribbons, alias strap material, I use anything which is thin enough and preferably could also be smooth. Some leathers may be softer and less stiff than satin ribbon, and will also be "trainable to shape" over time. I will have and/or cut 3 mm wide strips of the choosed material. To cut leather for this, I use a craft knife and a lot of handpower (because I use my blades even when they're dull, to spare them).
To start, I cut three 6 cm long pieces and two 4 cm long pieces from satin ribbon. (Note: some horses will need shorter or longer halter parts, so sometimes the 6 cm becomes 5.5 cm and 4 cm becomes 4.5 cm.)
Then I cut one 3 cm long piece, one 3.5 cm long piece and one 10 cm long piece from leather lace. (I of course forgot the latter from the photo... sigh.)
 |
Front rings, hind rings, rope ring, figure eight buckle, throatlatch hooks.
|
I spread the pieces and metal parts on the cutting mat into places I know are for each part. I could also write or otherwise mark where goes what.
ASSEMBLY
Alias gluing. I do not give recommendations on glues, because these vary, are not sold in every store or country, go out of sale when I start to like them, and so on. So use anything which comes in a tube and which says suitable for leather or is universal and hopefully will dry flexible. Currently I use Bison Tix, which always comes with a plastic spreading tool. This is a contact glue and will be first spread to both surfaces. Then you have to let it set a bit before splatting the surfaces together.
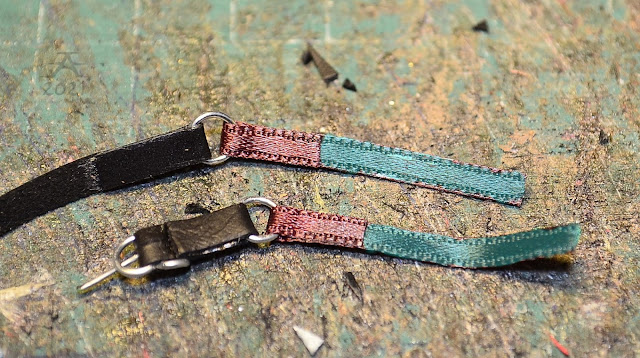
Since glues don't always show well in photos, I have colored the glue areas with turquoise. Red dots mark where each metal piece goes, in case showing this is needed.
I start with the buckle piece. I fold 1 cm of it and cut a slot in the folded part. I make it rather long, because it will be needed.
Then I take one of the 6 cm strips and cut its ends sharp, into an angle. This is the throatlatch.
Now I take my buckle and put it into place.
I also put the hooks into the throatlatch, into its middle part. Another thing I do is to put the rope ring into its leather piece (connector).
Once these are fine, I add glue to them. Throatlatches are often annoying to hold so I start by adding 2 cm worth of glue into each end. Then I let it set.
 |
The red dots show where the hooks will sit later.
|
The connector strap, where ropering is, is short but will not need any air, so I spread a blob of glue so that the tab will be about 5 mm long.
Next the buckle piece. I hold the buckle from its tongue so that everything should remain well in place and not move while I put glue where I want it. I try not to put any into the metal parts, and the midway of the slot should also remain untouched. This is because it should be where the buckle moves.
Now I let all these set.
Once set, I fold the glued parts together. For throatlatch, I first move the hooks from the middle to the ends, so that they're about in the middle of each glue part. Then I hold from the hook and carefully bend the tabs shut, so that each tab should be roughly 1 cm long.
For buckle I make sure the folded tab is about 1 cm long.
Now to the next gluings. I take one of the two 6 cm strips and use a homemade tool to bend about 1 cm tab. This tool I use to be able to add glue into parts where there is a loop that is glueless, so the metal parts can move freely. With it I don't need to waste time with the actual rings, which is when I could also mess them with glue.
I first put glue on the tab, then press it shut and rip open - partially by pulling the ring tool. This is why I try to add rather much glue, so it sure will spread and be absorbed evenly. I do this for both ends of this strap. Next I take its pair and add glue similarly, but only into one end. This is the lower half of a noseband.
I take the throatlatch and add glue into it almost for the whole length. A tool is good to have handy, otherwise I can't pick it from the mat as my glue tube likes to puke at this step. Let set.
Once set, I take the noseband parts and two big rings. I put one ring into a tab and bend it shut, then repeat. The one strip with only one glued end gets attached to one of these rings too.
I take the throatlatch and bend the middle part folded. From this, I continue folding the rest. When I reach the ends, I hold it folded with one hand and then twist the end so that the folded edge could be parallel to the flat tab in it (the twofolding covers some if it - and this is why I cut them into the angle!). Once I have folded and twisted the whole thing, I drape it around my finger and hold like this for a while. It should help the glue dry into a curved shape.
Now I take the 4 cm satin pieces. I use the gluing tool to keep them bent while I add glue to them, press the tab shut and then rip open. Let set.
Now when the throatlatch is done, I add glue to the connector. I mark the midline and leave it glueless, because I don't want the throatlatch to get stuck in it. Let set.
Once set, I take the two smaller rings, put them into the satin strips and press tabs shut. Cheekpieces are half done.
For connector, I first bend the loop only partially shut, so that it keeps its shape. Then I put the throatlatch through it - and make sure the folded edge is facing towards the ring - and then press the rest shut. I test if the throatlatch slides okay in it.
Now I move back into the noseband, and use the ring tool method to add glue into the lower half's remaining end.
Then I take the buckle piece and the 10 cm leather strip (which I didn't photograph...). I add glue to the buckle piece almost for its entire length (only avoiding the split part), and put 2 cm worth of glue into the long strip.
Once those are set, it's time to put the connector ring together with noseband. I put the strip through the connector's rope ring...
...through the other ring in the other half, measure where the glue area is and press it shut. Most people (beginners?) seem to glue everything by keeping the halter upside-down, but I do the hard way. It can get on my nerve, but it works.
Finished noseband with throatlatch and connector!
Also the buckle piece and crownstrap go into their cheekpieces. I make sure the flattened seam sides in rings go into these.
Once those are fine, I add glue into the cheekpieces. This is an easy part because the whole area will be covered in glue.
While they set, I trim the sharp ends off from the throatlatch hooks and bend them. I bend them outwards. So if your connector's seam is up, the throatlatch hooks should face down.
I also trim the buckle's tongue. Many leave it this long for some reason, but it is incredibly clumsy to use and no way realistic. I clip it with sidecutters so that the tongue is against the buckle edge, cutters being in touch with it. I also trim this, but it's not possible to photograph logically.
Now the cheekpieces should be set, so I put them into place. I put the halter so that I know which of the bigger rings is left side's and which right's, then roll them so that I can see the flattened seam sides. I put the buckled cheekpiece into the left ring, and the long strap cheek into right.
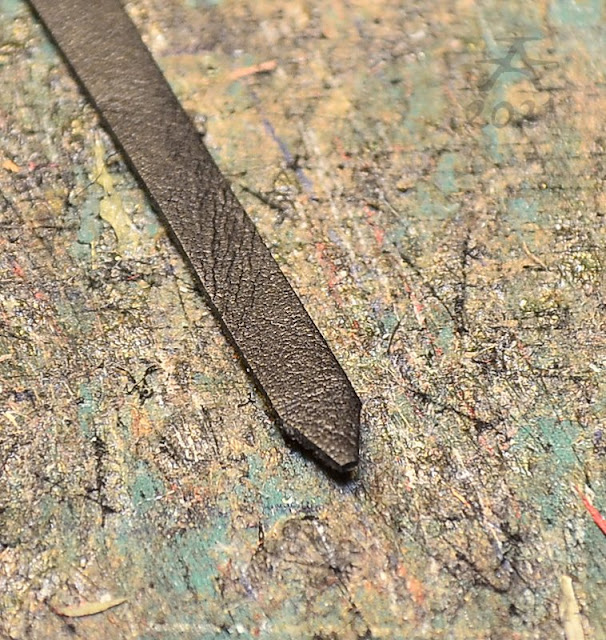
Next I trim the crownstrap with a knife. I cut the edges off and maybe a bit from the sharp end.
Now I position the mess of a halter so that I can see which part is where and did it go right. I put the right side's throatlatch hook into the crownstrap's ring and press it shut with needlenose pliers.
Then I take a needle. I hold the crownstrap against my cutting mat and put a mark one centimetre away until it's at the fifth. So, five needle marks.
I take my 0.3 mm mechanical pencil (I could also use a 0.5 mm pencil, but it broke.) and punch through those marks on a piece of thin and soft leather. I place the pencil on, straight, and press it down by holding the barrel with both hands. This has to be done carefully, and it should cause a little crunching sound when it goes through.
I also punch holes between each of these centimetres.
The halter is dun! Here it is all finished and put on a horse:
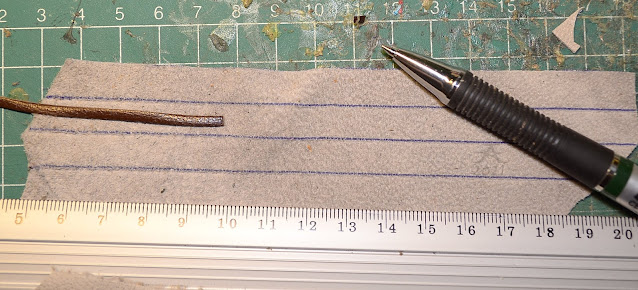
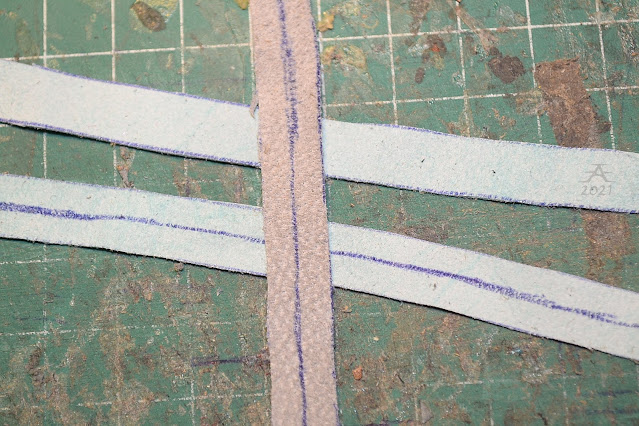
What about padding, then? It is totally optional. I add paddings preferably before gluing the chin piece and cheeks into the front rings, so the padding is easier to handle. For this you only need a strip of thin leather which is about three times of your noseband's width (mostly a bit less than 1 cm). And of course, you need glue.
Draw a line in the middle of the strip. (I use a ballpoint pen.)
Add glue to one half.
Fold the glued area so that the edge is at the midline.
Repeat gluing and folding to the other side.
Now put glue to the seam side, and to the underside of your halter's noseband.
Splat the padding and noseband together and try to make sure it goes on evenly.
I like to drape the piece around my finger so it could dry better into the curved shape.
Trim the padding's ends with scissors or a craft knife. Done!
----------------------------
So this was the basic stable halter tutorial which I have wanted to redo for a long time. Hope people get some use out of it.
Feel free to point out any parts which were difficult to understand. English is not my first language and I quite think there aren't even names for many parts in a piece of tack and its construction process, since normal people don't need to know such things. That is why I may cook up some names by myself. Also the steps don't always go exactly like in this tutorial... But it is basically the most common way I do these.