

What you need:
- thicker metal wire (0.9 mm)
- thinner metal wire
- jewellery pliers
- larger pliers and cutters
- contact glue that dries sticky; can be replaced with tacky wax or whatever you use
 |
| Builder pliers, jewellery pliers, and the wires. Glue and large cutters are needed too, in case anyone tries to read this picture literally. |
 |
| Thicker wire (0.9 mm). |
The actual tutorial:
Cut at least 20 cm piece from the thicker wire.
 |
| The wire's length really doesn't matter, except that it is better to have a bit more than less. |
Take the round pliers and bend a ring from it, usually as big as you can (jewellery pliers are small).
 |
| Round pliers, good for making jumprings and curves. |
 |
| Use the root for this step. |
 |
| A ring that's ready to be cut. |
Cut that with 'builder' cutters. Then repeat making rings at least nine times, because these rings are your friends.
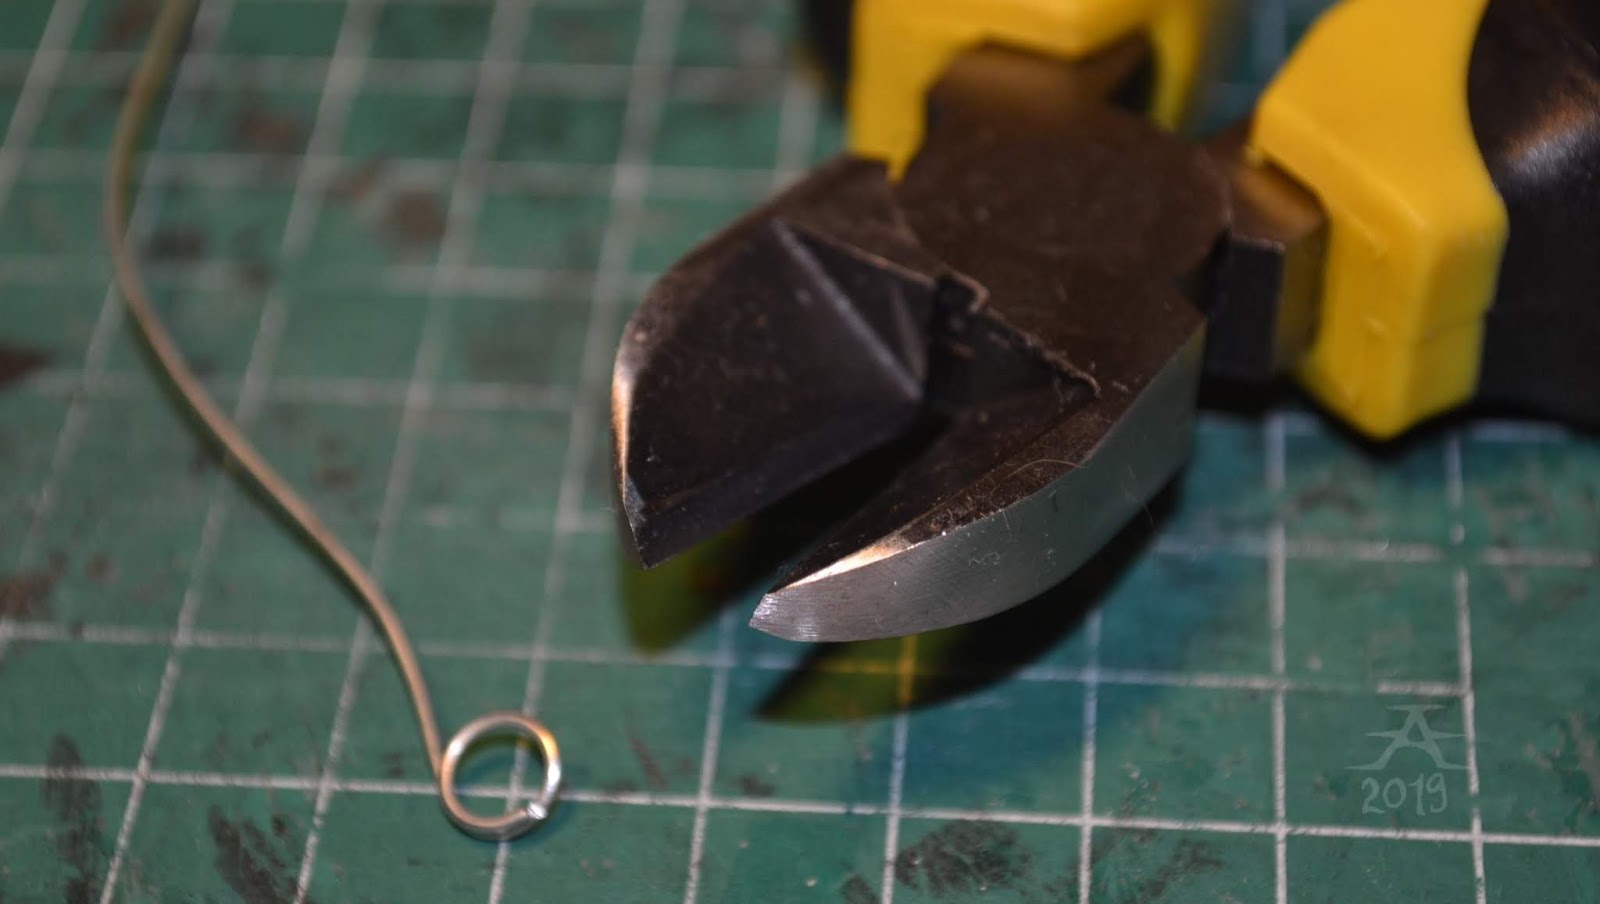 |
| The big builder cutters. I can't survive without these! |

 |
| Ring fresh after cut. |
Do not trim them or anything.
Cut at least 20 cm piece from the thinner wire.
 |
| 20 cm. |
 |
| The well-known round jewellery pliers. |
Make a tiny loop with the round jewellery pliers' nose.
 |
| Making the tiny loop. |
 |
| The tiny loop after shaping - it's hard to photograph. |
Bend it a bit backwards to make a even round loop.
 |
| This is not round, but just enough of a loop. |
Then get to pliers the loop seam area and bend a bit more backwards, so it resembles the letter P.
 |
| This way the loop seam gets hidden since it's against the horse. |
Take the piece and put it flat in the pliers' jaws, and let it bite. It flattens the piece, so it's even. (Make sure you don't straighten the excess wire too much from the loop seam.)
 |
| Biting the excess wire... |
 |
| ...and flattening the loop part to make sure it's straight. |
 |
| This is good enough for me. It depends from horse to horse how much the loop should look P or should it be rather just a loop with an excess wire. |
Measure about 5 mm, use the root of your pliers if that matches it enough.
 |
| These pliers have the roots in a shape of square. |
 |
| About (roughly more than) 5 mm marked by shaping a corner. |
 |
| That square is 1 cm alias 10 mm wide. |
Cut it.
 |
| As a whole the piece seems to be almost 1 cm long. |
Make those thin pieces as much as you do the thick rings.
Now we have a) snaffle ring and b) mouthpiece. Let's assemble the whole thing.
Take a thick ring and a pair of thin-nosed builder pliers (or one builder and one jewellery). Hold the wire ends with them, then bend a bit sideways to open the ring nicely.

 |
| Thick ring opened. |
Second, take a small piece, alias mouthpiece. Put the loop end to the thick ring.

Use builder pliers to bend the ring close. 'Bite' it flat.

 |
| Biting. |
Now your bit (and hopefully it's pair) is done. Play a minute with the bit, because it is awesome and we are childish enough to do that.


When the bit is done, we have yet to figure out how to attach it to the horse's mouth. It depends from each hobbyist what we prefer, and if you can use Tacky Wax or something else, go for it. But I use Pattex contact glue because it dries sticky and works for metal as well as for leather.
This step requires a handmade wire tool. Take thicker wire piece and bend few loops to it's other end to make a handle. Make sure the tool is long enough (about 10-20 cm + the handle). Bend it's end with round pliers or fingers.
 |
| Wire tool's handle. |
 |
| Seems it's over 20 cm long - it must be. |
 |
| End bent. |
To make the bits actually work-able, open your contact glue tube and blurt a bit of glue to a waste piece, like here the glue tube package remains.
Beware: I don't have experience of more than one type of contact glue, and I don't know if the other glues are sticky too or only this what I have. This my glue is meant to be applied on both surfaces and let dry a bit (about 15-45 minutes) before splatting the surfaces against each other.

Have something to put stuff to hang from if they need to dry without touching surfaces. I have this:

Put the bit and it's partner to hang in that, the 'outside' areas being against each other. This helps with gluing since you can actually see what the toe you are doing.
 |
| The seams are facing out of each other, see? Meaning the actual outsides are against each other. |
Dip the wire tool's end to the glue. Apply it by stroking/petting the mouthpiece's inside area a few times. Try to add a thick enough layer of glue, so it has some sticking surface; I also cover the mouthpiece's end with glue as that could possibly protect the horse from it's sharpness.

 |
| Petting the bit. |
If the glue feels difficult to apply, let it dry a bit and put more later. About three layers is usually okay, since the glue gets thicker and so has more surface to stick and so stays better on when 'put in the horse's mouth'.

Leave the bits dry for a couple of days. Just let it dry more than what the package tells you to, because you're not going to stick that bit to your horse forever. Go for example eat something or walk during waiting.
After the drying, test touch the glues. It should feel rubbery and sticky but not too soft or sculpt-able, and my glue also changes from white to transparent when dry. I found out it's better to let the bits dry for a day or couple more so the glue really is dry enough to use; if it's not, then it may either be too soft or that and so sticky that it bites some paint off from your horse when you unbridle them. Yes, I've been this stupid that I injure my models because of some bits; at least it's now proof that this glue is strong. (Maybe paint and varnish quality has some part in this; the glue sticks very well to Vallejo Acrylic varnish - better than in any other surface my horses have had - but hasn't damaged it yet at all!)
Because the contact glue is sticky, it gets all trash in it very easily. With bits that is mostly irritating, but that can also protect the horse's paint surface if there is a danger of damaging it with rough handling. When the glue is too dirty after much use, just add a new layer of glue and let it dry. You can remove all old glue first, or leave some to help the new layer to have some surface to attach in.
I personally couldn't recommend using contact glue with resins or other very high-quality models, since it would upset yet more to damage them with it than the regular factory ponies. Partly because the paintjob in resins is usually (if not always?) an artwork done by professional hobbyists, and injuring that could feel extremely bad. A great artwork is more valuable than the risk of ripping paint off from it because of some damn bit.
Storage of the bits
To keep the bits organized and away from disappearing, I keep them in some small storage boxes that have partitions in them. There they are protected from air and trash that could dry the glue in a way that it loses it's stickiness.
Some photos of the bits in actual use:
 |
| Snaffle with a chocolate brown mouthpiece - this seems to disappear quite well with dark colored horses. |
 |
| Green mouthpiece. In monochrmoatic photos that could also disappear quite well. |

 |
| Right placement - not in the corner of the mouth, but a bit higher! (And that mouthpiece has already some dust in it...) |
But anyway, no matter what you use for attaching the bit to your horse's mouth, try to have fun with it. I've also documented a how-to for a curb bit, so let's start to wait it then!


