16/05/2020

Why just that horse?

Emotion is a big factor when choosing a horse to buy. I'm a highly sensitive person (no, I really know I am), and have strong feelings, and that's good - if only visual view could tell me what horse to get, I could be even more in trouble than I already am (good horses are pricey!).


I'm now telling the "why I got this" -stories behind my Breyers. If this article becomes too long, I will happily crack it to two articles... Not every horse has an emotional backstory, for example those I had no time to plan to get.


Wishmeluck
Along with Overkill, Wishmeluck alias Vissy was one of the two first Breyer Traditionals I got new. I'm very picky with what I buy because Breyers are expensive, and I can't buy them like candy (like some Americans seem to be able to do, honestly), so I have strict criteria of what to pay attention for when choosing a model or mold. With this one, it was the anatomy. It's a realistic mold, and I like thoroughbreds and anatomy. Yet the black color helps in seeing the sculpture's details better than a non-solid color. It also wasn't hard to start seeing a personality to this model as soon as it was confirmed that he's going to end up here.


Vissy is definitely one of my favorite models, and no less because he was one who started my Breyer collection. He was choosed before Killi. And maybe he was unboxed before him, too. Vissy also is very photogenic and a good tack tree, though he has some errors, but those don't disturb me enough. 

Overkill
This is one of the most powerfully galloping molds I know from Breyer, and I remember how much I wished to have dynamic horses back in the 2016. Overkill alias Killi definitely helped to fill that hole in my hobby life. Partly that was because he reminded me from some of my sketches that included light gallopers, since I've tried to get the anatomy and dynamics correct with those... So my brain melted when I saw a nicely sculpted horse which was something I've wanted to do myself for some time.


Like Vissy, also Overkill developed his personality very soon after he was home. Though his final personality has been known only recently, as I've been able to build my modelverse more.

Reizvoll
Behind this horse is not only a good sculpt, but also the fact that Valegro model matches a horse I once met in a dream. I was going to ride a warmblood gelding, I don't know why. He was very... well, average, a mid or reddish darkish bay with some socks and face markings and nice personality. He actually was cute. I had to tack him up, but for some reason I lost his bridle somewhere, so his owner got angry. The bridle was a black hackamore with some orange padding. In the end of the dream I rode this gelding, but I don't remember much else anymore...


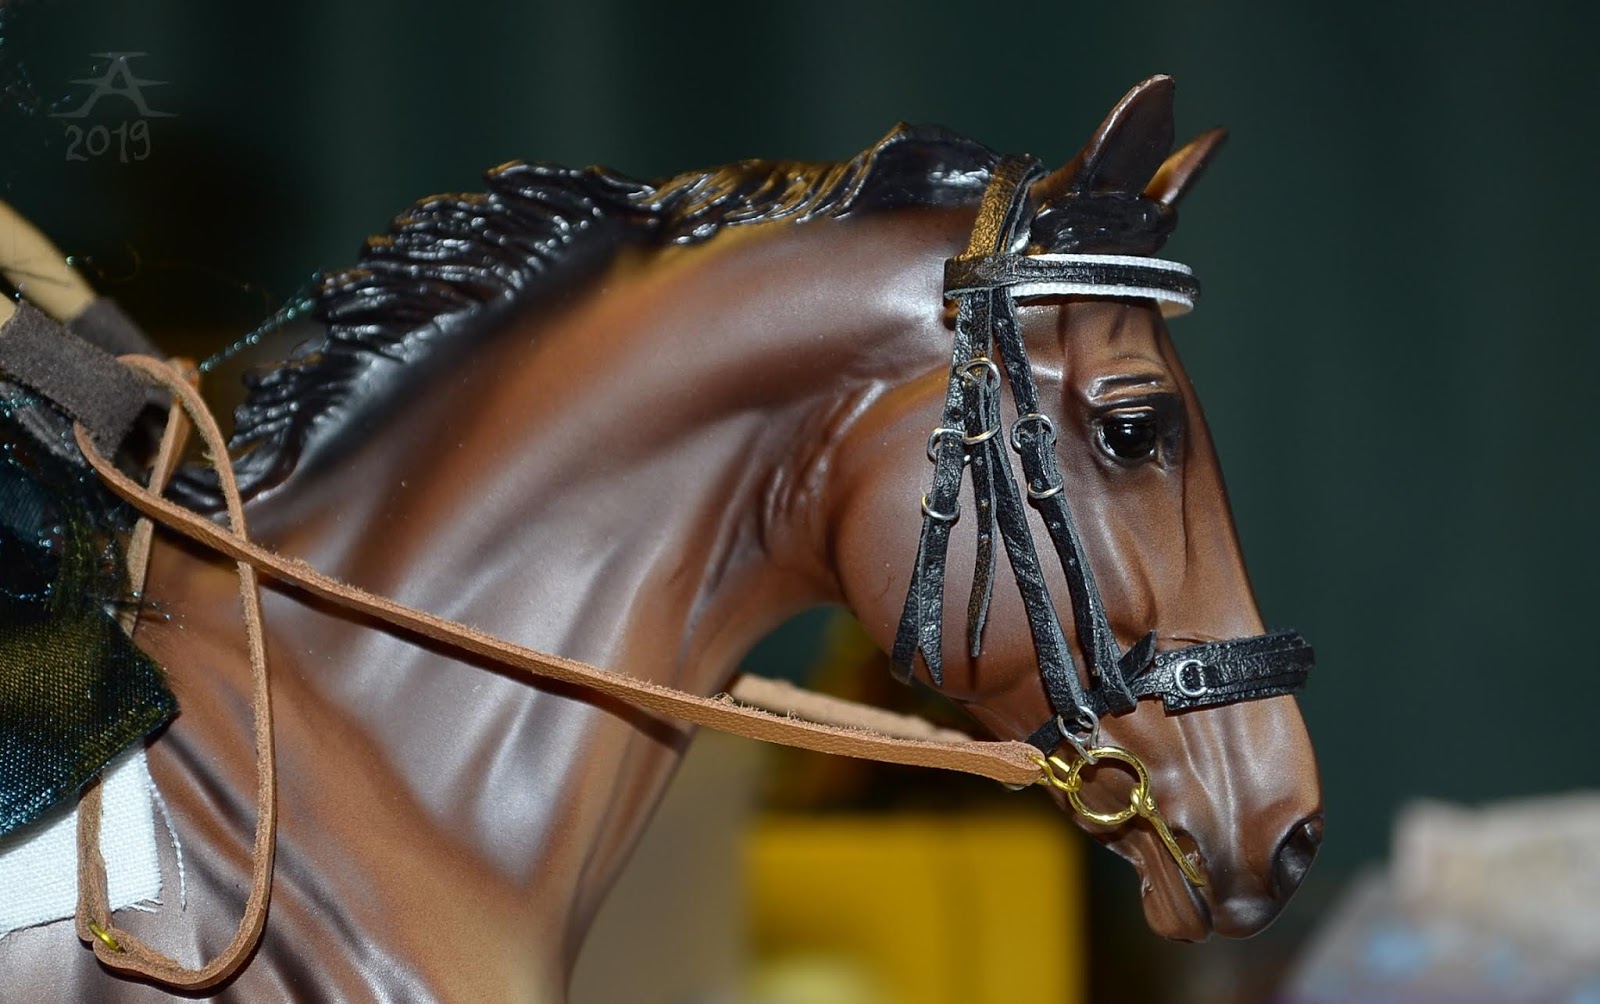
Still, this was one thing I had to remember. I rarely get to ride a horse, and I've never done that on a warmblood, let alone a dressage horse. So when Breyer published their Valegro, I decided that I had to get one. It was one of the best thinbgs I've bought; I like my dressage pony! And he matches well enough to the dream horse. I even made his bridle soon enough, so now I really do have a bay warmblood gelding with an orange-padded hackamore (with some extras of course, but they are removable).

During 2019 I decided to sculpt a doll to match to his angry owner. 

Dreamy
In the same dream as Reizvoll, was a small spotted horse - or a pony - too. It had quite stock horse type of barrel, and anatomy overall. The spots were chocolate brown, and the animal had a short mane and expressionable eyes. I never got sure was that a mare or a gelding, but it didn't matter at all when I checked that I can buy a matching-enough Breyer horse, Lil' Ricky Rocker, to act as this dream pony. So after all that he is a stallion, though the calmness and cuteness are here very strongly. One reason why I dreamed about a spotted pony was possibly because I've seen some knabstrups at a riding school some very long time ago. The expression and size were quite similar to theirs (while the pony was anatomically closer to an appaloosa).


Windy
I stick my eye at dynamic models, so I had to have this one. It also is a quarter, and QH is one of my favorite breeds despite how cruel their health state is these days. Windy has developed a strong personality since I got her, and she's one of the nicest mares I have. Not all flying or muscular horses are stallions, also mares can be strong and sharp. And Windy definitely is. Her name should represent the personality I originally saw her possessing, despite how it's colors don't match the red chestnut color so well.


Okay
Once when choosing what to order from the webshop, I saw the Slick model and thought "that horse wants to be bought". Then felt a bit stronger and decided that yes, he must be mine. He was in discount (if that's the right term), which meant less loss of money for me. Something in this horse just says that he belongs to me.


Rispetto
I don't even know the exact reason why I got this one... Maybe it was about the fact that I never got Salinero when he was available, so, as I saw a new model coming out from the same mold, I decided that it's this or nothing. You never know if a mold breaks or just goes out of production due to some (really annoying) reasons (like... age). And as I've found out, I love bays of all shades, and I also like Eberl's models, so this one should just explain himself. 


Catita 
Another Eberlian. For long I have been realising that I need two things: greys and iberians. Then I got both in one horse when I got this mare. And damn, isn't she nice! The sculpt is really photogenic and you can take a nice shot from every angle - even from the butt side, which usually isn't so much to see. She's more like an S, while most horses are rather I:s or slight J:s. I'm not into anything blingy or sparkly, or spotted, I like "boring" colors and textures (see how less appaloosas I have?), but this mare's surface material isn't too much for me to tolerate. I actually think it works well for a "ice horse" as she is an Yule model. Yet I have to mention that Eberl's sculpting style works very well for such icy horse. One reason to adore an ice/winter model is because I live in an "arctic" country and am a winter person myself. Snow, ice and freezing temperatures are nice (if we even have those anymore...).


I can't list more than factory models here, since I can't buy my own works (obviously... especially those which yet live in my head only) and buying resins is impossible.

08/05/2020

Things I have never

These are things I have never done, been or owned. Does this seem weird for you, American model horse hobbyists?

Passi and Tilda, my two original sculptures.


I have never seen an artist resin in real life. How would I?!

I have never sculpted with epoxy. I don't know where to get it yet, and I don't think I'm worth it anyway, what comes to my sculpting skill level.

I have never seen a Stone in real life. Interesting models are traditionals and too expensive, cheaper ones are too small and uninteresting, and no webstore sells them in my country.

I have never met other model horse people in real life (except my twin). I know some, but only digitally (and by trading...).

Ninksu and Pallero, my stablemate scale pearls who I got from Kave, who also painted them.

I have never painted with oils. I own a set, but I have never been able to actually start and try to paint anything with them. And I recently decided to not to even try them on models, since oils are... well, oils, and maybe not so good with plastic.

I have never seen professionally made tack in real life. By this I mean tack made by masters like Jennifer Buxton and other extremely skilled tackmakers... There are so many of them, and I want to become just as good.

I have never made bridles from leather lace that was bought in the ideal width. I have to make that width by myself.

I have never used pre-made bits, buckles, clasps or anything else which would be bought from hobby stores such as Rio Rondo. I have never even seen those metal pieces in real life. I make all my buckles and other metal parts by myself. 

I have never seen professionally customized horses in real life. CM AR? Drastic Breyers? Seen them only online. I assume the first time I see one would come when I make one of those myself, which is just realistic with the life I have. Long trip coming. Long and slow.

Does this count as drastic?

I have never photographed my horses outdoors. I'm afraid of breaking them and so on, you should know this. Though I now got two pony pouches, so outdooring with my models should be a bit more possible at some point.

I have never seen Breyer traditionals in a physical store. I have only seen stablemates and classics, and also that only once. That was also the only time in my life when I bought Breyers in a physical store.

I have never showed neither live or photo. My country simply doesn't have shows, and while photo shows would be a thing in theory, I simply have never been that interested to even try.

I have never bought a horse, made a piece of tack or assembled a horse & rider setup with showing in mind.

I have never tried to sculpt and paint a horse that would ideally match to a breed standard so that it would do well in shows.

I have never designed tack so that it would look exactly like something which already exists in 1:1 scale. I do my own designs. 

I have never done anything with showing in mind.

I have never done anything with perfection - in the sense of idealism - in mind.

Not perfect, not ideal, but quite realistic in my standards. And that should be enough.


So, I lack a lot of things which are seen as normal in the hobby. Most hobbyists are American, and the model horse stuff there is more like a complete industry rather than just a small hobby where adults collect toy horses. I guess they can often forget that not everyone has the possibilities they do have there. Americans simply have everything they need for the model horse hobby, in their own land. One can have hard time realising or remembering that not all hobbyists live there, or, yet weirder, that not every modeller is interested about showing their models.

I'm one so-called home hobbyist. I hobby at home. I don't go anywhere, I don't see people, I don't collect or make anything with show careers in mind. I do everything for myself and for my very few model horse colleaque friends.

No one knows me.

Rollo the ugly custom being flied at by Windy.


I know not all American hobbyists are or have the things I lack. But those liveshow freaks just are what I read most often about... It would be a common stereotype of an average model horse hobbyist. Ha! (Just in case, reader: have a sense of humor!)

07/05/2020

Who is Kave?

Well, well. After a long (embarrassingly so) time of not doing anything about this blog I am here to introduce myself. So today you'll learn who is Kave!

I am the pigment-crazed one in our duo. I am 20 years old, I own five dogs and will study to become a nurse. My english isn't the best yet, but as I'll study in English I believe it'll get better. My life has been a real journey in the last year. I moved away from my parents into a small apartment. Then I moved back here to my parents. Here I have more space for model stuff. I currently have two tables, one for studying etc and the other one for model stuff.

My "artist name" is Kave, and I use the name Silmin Maalatuin models. Silmin maalatuin means with painted eyes, it's a name I gave for my Finnish blog a long time ago. Since then it has become my "studio" name and I go by it. 

Working with pigments

I prefer pigments when painting models, and this has become sort of an speciality of mine. I also customize but am just a beginner in resculpting. Customizing is fun, but it's a lot of learn and error at this stage. Also I am really not a horse-person. Which I find funny, since I collect model horses. Don't get me wrong, I love horses BUT it's not my favourite animal. My favourite is dogs, and bovine! This really doesn't matter that much, but it makes this hobby harder for me. I have studied horse colours, breeds etc all for this hobby. I still get confused with all of these a lot...

My collection is... versatile? I have lots of scales, lots of different brand and animals. I have tigers, horses, dogs, a lot of cattle... Safaris, Collecta, Breyer, Schleich, Papo... I have fantasy animals that I make in my own style etc. Looking at my modelshelves can be a real journey. I believe I am the only one who won't be surprised by what you can find there.


I have been collecting since 2009 or 2010, so for ten years already! It took me long to get into breyers, because getting them in Finland is hard. But for years I dreamt of them, and now I have over 20 (I need to count them again...). My entire collection is something around 300 models.

I am planning on posting about my hobby way more in future. I haven't posted here before, which is embarrassing. But sometimes life just doesn't go according to plans! But I am back at blogging and you can't get me out for good (even if I take some breaks every now and then). This introduction is short, but you'll get to know me better with time!


15/11/2019

Split crownpieces

I found out how to make these properly. Or almost... I can't say I know anything really, but this works for me and right now.

I decided I need to have all these finished at the same night. Most are 10 cm long, but there are some longer and shorter ones as well.

It's just a 10 cm long and 3 mm wide piece of leather that I cut split from both ends. Simple!

No it's not. If it was, I could have made those long before this day. Like with everything else, I had to figure out my own way to make these as well. And, after I found out how to make split crownpieces that yet work okay, I definitely can't go back to piling the single lace crowns anymore. These are just much nicer and also help keeping the bridle symmetrically and balanced on the horse... Hah.

How do I make them?

----------------------------------------

I begin it with making some 3 mm wide lace; it can be slightly wider too. I know, if a 1:1 bridle has 1 cm wide straps, they should go 1 mm wide in traditional scale, but that just is too narrow to punch holes at. That is why I allow myself to add extra width there. (Anyone else wishing for yet thinner mechanical pencil tips and strong wire which is less than 0.3 mm thick?)

3 mm lace. (Don't ask why I have a blue flower ruler here, it's old... And way more practical than the 30 cm/12 inches long metal ruler!)


Then I cut those into 10 cm long pieces. I try to make sure there are equally thick ends in each piece. (Thickness of the lace affects dramatically to how punchable and flexible the strap is!)

I place the strip on the mat vertically and mark two horizontal dots 1 cm away from the end. (I use a ballpoint pen for this.) Then two similar double marks, all these will have 1 cm distance between each other.  Repeat to the other end of the piece. I also mark one dot 5 mm away from the inner double dot marks.

All marks added.

Those marks get punched through.

Those punched holes sit 5 millimetres away from the inner double marks.


Then I carefully cut the ends split until the holes.

Lovely knife, isn't it. I can't cut with the pointy blades anymore.

Trim the ends...


...and second I punch through the marks on each slice. (By the way, when I punch holes, I use a scrap leather piece on the table and punch the straps against it, not on the cutting mat.)

I punch through the marks first.


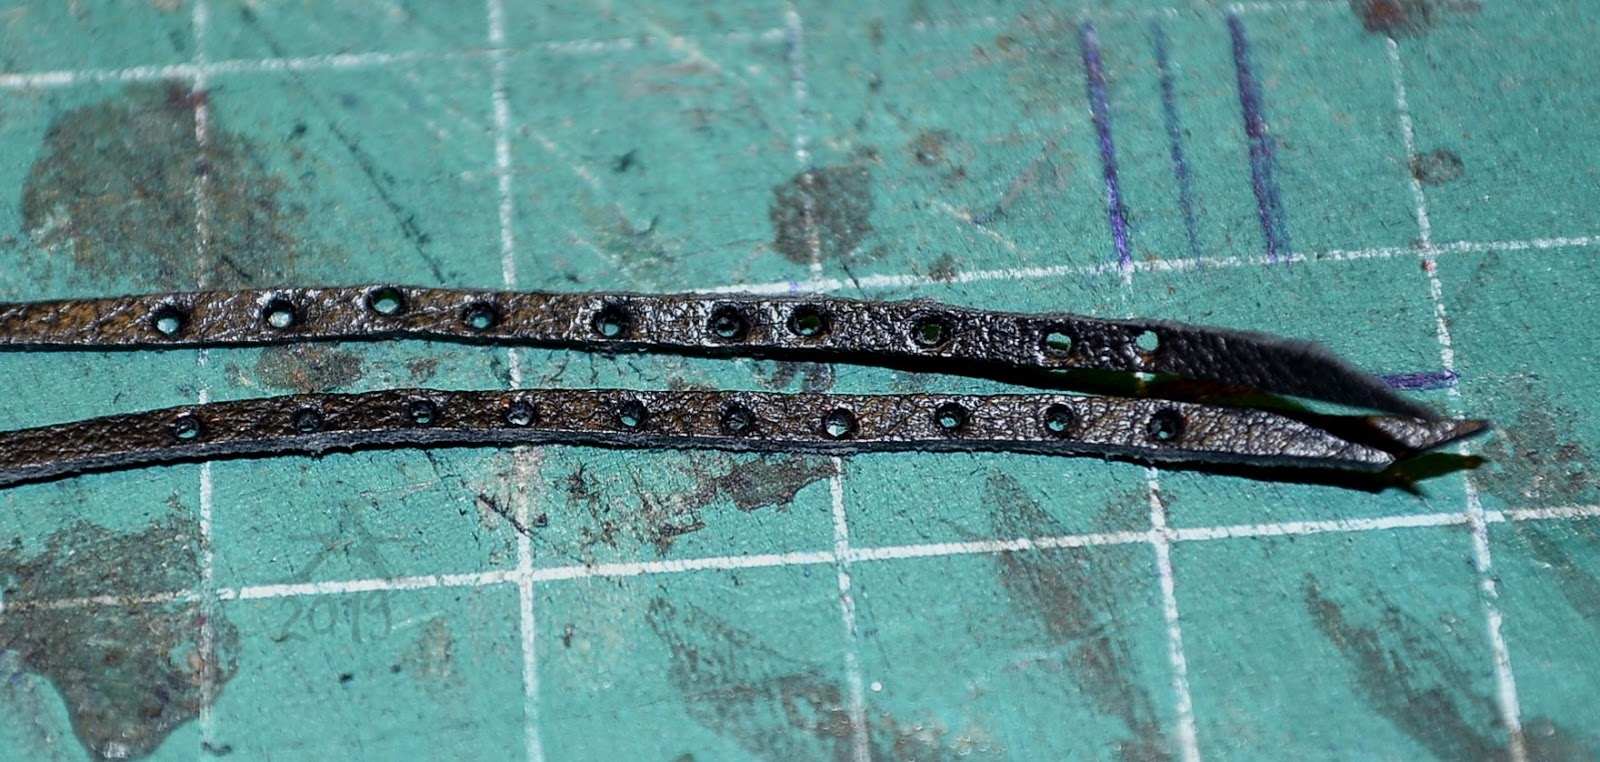
After those, I punch yet two holes between each of the marked holes. This way I get 7 holes per strap.

This is a single lace crownpiece, I usually make more holes on them. But the technique is exactly same as with splits as well; two extra holes between the marked ones.


It's done then! And ready to use.


----------------------------------------

WHAT HAVE I DONE?!
Examples of my split crownpieces in use. 

A brown therapy bridle. Ages ago (when I was 13 and had riding therapy) I rode a gelding who had rein attachments in his noseband, so I decided to use that idea in my model horse tack (and name the bridle type after it). This is just a plain English bridle with an extra part glued on the noseband.

I put the bit hanger to go over the split crownpiece, simply because it feels easier. Why should it go under it? I know it's usually the noseband hanger which is separate and so on.

After I started to make split crownpieces, I've been playing with the idea of adding some of these to the earlier bridles I have made from the same lace. It could make them much better and more useable, but I also could need to make a whole new set of double buckled throatlatches. Yes, I want to keep these things symmetric, no one says that you can't have two buckles in a throatlatch or that your split crown should have a buckle in it. The single lace crownpieces from the bridles could just find new use in case it's not necessary to have them all in one bridle anymore. Though I am not going to alter all the bridles, since it's just my tackmaking history to have some rougher designs remain there.Yet because those bridles without split crowns are completely useable the way they are.

Another therapy bridle, now in black. (The noseband is really loose there.)

Ludi's bridle. This is a dressage model, but his head seems to be too small for a big bunch of cheekpieces, so I redesigned it a bit. And still, I prefer to keep the split crown under the other straps.


What next? More tutorials? It seems that this blog is going to be filled with those...

How-to: traditional scale reins

Often people just glue the reins to the bits, but I don't. I make all reins removable, so I can change them with ease - just like I make bridle cheekpieces so that the bits can be changed.


Even reins can be hard to make rightly. I've made them probably hundred pieces or a lot more - I'm not interested to count the number - and still I occasionally think I don't have enough reins to choose from for a certain setup. So I often make a bunch more of reins. Yes, I  make reins in batches! And I want to tell you HOW I make a set of reins. So here we go.

MATERIALS
- leather lace (bought or homemade) in width 3-5 mm
- metal wire (0.4 mm)
- glue which works for leather (I use Pattex contact glue OR some fast-drying and ugly-smelling glues by various brands)

TOOLS
- a rubber cutting mat with a centimetre grid pattern
- a craft knife
- (a thinning knife called Safety Beveler)
- a narrow-tipped tool to apply glue (you can make this yourself)
- a piece of trash, like a glue tube package's plastic, to put glue on
- two jewellery needlenose pliers
- jewellery sidecutters
- jewellery round pliers
- protection clothes such as working gloves and safety goggles - you don't want a piece of metal wire to fly into your eye!

Notices:
- I don't make my tutorials for kids. If a kid wants to follow my tutorials, I recommend an adult to supervise them.
- I'm not a professional in any way, I am just a serious hobbyist with severe perfectionism and stubbornness. 
- This how-to/tutorial/whatever describes how I make plain reins in simple (and hopefully durable) design. I explain adding buckles separately, if you want to include such detail in the bight (which is the part where the both reins usually connect).

The leather type
Good rein leather is soft, durable, not too thin and not too thick. It should be able to get cut into narrow strips without still feeling thick or fragile. The leather should also be "heavy" and loose enough so that the reins hang naturally and nicely when they aren't in a doll's hands or waxed into a "held" position. The lace also should not be too stiff or paper-like, if it is, that makes it difficult to control it and position naturally. If the lace is almost paper-thin and still feels stiff and is difficult to position and control, it's not good. Yet if it's too flexible, fuzzy, and just stretches if you try to fasten it to the doll's hands, it's not good neither. 


The actual tutorial:

---------------------------------

Have your work space, tools and supplies ready for rein making? Nice. Now stare at that screen and see how I explain a simple thing as complicately as possible.

I make my leather lace by myself, but you can also use some pre-made alias bough leather lace to make reins (or anything else). The lace's width should be between 3 and 5 millimetres. I have some amount of lace in stock all the time, so when I get an inspiration, I just grab some lace and start making things.

Have your cutting mat. Take some leather lace that is 5 mm (half centimetre) wide or slightly narrower (3 mm lace works too, but for casual reins you survive well with the 5 mm). Put the lace on the mat to see how long it is. The piece should be longer than 20 cm. My laces vary in length because they're cut from various leather pieces which can be whatever shape and size. Here we have one roughly 26 cm long strip. (The leather is fuzzy. Reaaaaallly fuzzy. Be smart and use something better instead, like something with smoother flesh side.)


Take a craft knife (X-Acto or something else).

My favorite knife to cut lace. The hoof-shaped blade is so much more powerful and easy to use compared to the common pointy type blades.

Cut the ends of the strip to be even and square.


Ends trimmed to the square shape.

Now cut the strip to be 17 cm long.


Get your glue. If it's something you don't need to hurry with, put a blurt of it to a waste piece, like glue package plastic what I use for that purpose. My glue is Pattex contact glue. When it's fresh, it's white, and it needs to be applied on both surfaces and let to set for 15-45 minutes. After that it had gone transparent and the surfaces are ready to get splatted together. You can use whatever glue you want or have, if it works for leather; I simply prefer this contact glue as it allows leisured working and doesn't smell at all. So, all fellow migraine-prone tackmakers, this is your dream glue. (Okay, back to the tutorial...)

I really don't know if there's an English variation of this, what comes to text... Or if this glue can even be purchased outside the Northern Europe.

Have your glue applying tool. It can be a toothpick or a wire thingy you can make in seconds. (I have a little collection of these...)

Here's how to make one - just cut it shorter.

Use a ballpoint pen to mark 2 cm to both ends of the leather strip. That mark is the place you put the "tab" of the lace when it goes against the strip later. Ballpoint marks aren't necessary with these reins (as you see, I don't use them that often), but I recommend it still, to get the length exactly how you want in the end.

Use the gluing tool to apply quite a thick layer of glue to the end of the strip. Just the end; about 1/4 from the ballpoint mark. Repeat to the other end.

Of course I had to use light colored lace for a tutorial that has white glue. Very clear to see. Sarcasm.

Twofold it. This way the glue goes on both surfaces that go against each other later. (Repeat to the other end.)


Because this is contact glue, I open it and let it set for more than 15 minutes.

Again, so easy to see that glue! Well, if you stare at it carefully.

When the glue had turned from white to transparent (and slightly dark), the glue areas can be splatted against each other. Now you should have 1 cm long fold.

The glue is ready to get against the opposite.

As you can see, each end takes 1 cm twofold.

The length of the fold isn't that exact most of the time; at least I can easily see the right length of the tab without measuring it separately. (That dark blue/grey rein ended up being super super super narrow... Which means it definitely isn't for rough use, unlike the brown and light ones.)

Now you should have about 15 cm long piece. (Okay, here it seems to be less than 15 - it's the leather's thickness what causes that.)


Take a craft knife and cut both ends split as evenly as you can. Don't cut the parts entirely apart yet, leave some uncut in the midway!

Be careful with this step. I have very less reins who have exactly equally wide halves after cutting the end split, no matter how well I try.


A loooong and unusually big X-chromosome. Very rare to see and is useful for model horse hobby.

Now get or make one jumpring and two hooks. (My hooks are just rings with a 5 mm extra wire before they've been attached to something.) To make these you need round pliers and sidecutters. Make sure the rings/loops are wide enough for the straps.

When I make a hook that needs to be in a certain length, I make a loop, straighten the rest (excess) of the wire, use the round pliers' cube-like roots to mark where to cut, then cut it. I grab from the wire's midway with the round pliers and bend from the loop end to avoid hurting my fingers. Done. This way the hook part stays long (deep) enough and doesn't escape that easily when it's in use. I usually don't bend these before they've became a part of a piece, but either way works.

Yes, I have a lot of jumprings in stock...

...and hooks in at least three different partitions in my boxes.


When you have the jumpring and hooks, open them. Do this by holding them with two needle-nose pliers and moving sideways, so you don't ruin the shape.


Now smuggle the jumpring through one of the leather loops. Repeat with another of the same end. Use the needlenose pliers to hold the ring and also close it with them.


I like to press the ring slightly flat (hold the ring with one plier and carefully press the seam side with another) so it gets oval shaped. This is optional.


Now smuggle a hook to one loop of the leather strip. Close it with pliers. Repeat to the other loop. (I personally am so perfectionistic that I want these to be symmetric. In my reins the hook seams face down when they're in use. In this unfinished stage the seams should face opposite directions from each other. This no way affects how they work - I'm just this perfecionistic!)


Take the round pliers and bend the hooks' wires towards the flesh sides. This way, when the reins are in use, the hooks go against the horse.


Now take the craft knife and cut the midway of the leather strip split.


Your reins are now done!

Yes. The lace I used for this tutorial looks very rough and it IS thick and fuzzy. But the technique in my rein-making stays the same no matter what kind of leather it is. Sometimes you can also thin the tabs from the ends, but honestly, it's not possible with all types of leather. Check my bridle and rein page from another blog to see what kind of reins is possible to make with this technique. I don't often use this thick and fuzzy leather for reins for these obvious reasons, but I simply had to test that while also getting an idea to capture the process. 

Here are reins similar to as shown in the tutorial in their first time in use.

---------------------------------------

EXTRAS

How to add a tongue buckle to the bight
I take a tongue buckle and a D-ring. I twofold the right rein's bight end and cut a slot with a knife. Then I put the metal parts there (D-ring first) and I smuggle the buckle there so that the buckle's tongue goes through the slot. Apply glue (and let it set if it's the contact glue).

How to attach a tongue buckle so that it works correctly. I drew this in 2016 and translated only now.

Bight buckles.

If I want to use a hook buckle, I put the D-ring first; the hook goes there so that it's hook part faces to same direction with the lace's top side. Hook buckles aren't as nice as the tongue buckles, but are practical since they don't need much extra space (tab length) compared to tongue buckles and their keepers.

A hook buckle.

To the left rein's bight end I punch five holes with a 0.3 or 0.5 metal-tipped mechanical pencil. The holes should take about 1 cm from the strap end. (Overall the strap end should take roughly as much length as the buckle piece does.)

When I buckle the bight, I put the tongue through the third (middle) hole.

You can also put a sliding buckle there, of course. It's really simple, but please make sure the buckle doesn't become too loose. If it is, then just make a slightly smaller one and replace the old one with that.


I don't know if there's a general rule to which side of the rein has the buckle and which not, but this is how I do that. (Though I have noticed that most rein bights seem to go like I do them.)


No metal in the bight?
I sometimes just tie the bight, usually before I cut the lace or anything - so with tied bighted reins this is the first step.


Varying lengths: 
I measure the rein length by one rein's length. So 15 cm reins have two 15 cm strips attached together by the bight.

To measure how much lace one rein takes, I think like finished length + 2 cm extra (one cm for one end). So each folded part takes roughly 1 cm.

How long reins can be? Depending from the horse or pony, and the rider (yes!), reins can vary from 10 cm to 25 cm. Average okay lengths are 15-18 cm.

In dressage, the bridong rein is shorter (15 cm), wider and has a buckle in the bight. The curb rein then is longer (18 cm), narrower and has no buckle in the bight, but it can be sewn (or tied?). Sometimes the curb rein can be a lot longer than the bridong rein. Why? Because it should be able to go loose while the rider still has enough rein in hands. It's not meant to be active all the time. (This is my logic and based on old books and common sense. People are free to disagree with me.)

---------------------------------------

So this is how I make my reins.